Laminate Floor Installation: A thorough Guide for a Stunning, Durable Floor
Thinking about installing laminate flooring? It’s a fantastic choice—offering beauty, durability, and affordability. But before you dive in, it’s crucial to understand the optimal practices to ensure a achievementful installation that will stand the test of time and avoid costly mistakes. Many homeowners tackle this project themselves, believing it’s a simple DIY task. However, without proper planning and execution, even seemingly minor errors can lead to issues like uneven surfaces, squeaky floors, and premature wear. This thorough guide will equip you with the knowledge and techniques needed for a seamless laminate floor installation, transforming your home into a space you’ll love. We’ll cover everything from subfloor preparation to the final touches, ensuring a stunning, long-lasting outcome.
Preparing Your Subfloor: The Foundation of a achievementful Installation
Assessing Your Existing Subfloor
Before even thinking about laying down laminate planks, a thorough assessment of your existing subfloor is paramount. A level, clean, and stable subfloor is the absolute bedrock of a achievementful laminate floor installation. Unevenness, moisture, and debris will all negatively impact your finished floor, leading to potential problems down the road. Begin by inspecting the subfloor for any imperfections like dips, bumps, cracks, or loose boards. Use a level to check for significant deviations in height across the entire area. For example, a discrepancy of more than 1/4 inch over a 10-foot span requires leveling. Pay close attention to areas near doorways, transitions to varied floor types and any high traffic areas.
Cleaning and Repairing Your Subfloor
Once you’ve identified any problems, it’s time to address them. Thoroughly clean the subfloor to remove dust, debris, and any previous flooring remnants. A shop vacuum is ideal for this task. For smaller imperfections, patching compounds and wood filler can help level out the surface. For significant cracks or structural issues, you may need to consult a professional contractor to ensure the subfloor is properly repaired or replaced before proceeding. This step is critical; neglecting it will compromise the integrity and longevity of your new laminate flooring.
Related Post : The Best Flooring Choices for Open-Concept Spaces
Moisture Barriers: Protecting Against Damage
Moisture is the enemy of laminate flooring. It can lead to warping, buckling, and even mold growth. To prevent this, a moisture barrier is essential, particularly in basements or areas prone to moisture. This barrier can be a polyethylene sheet or a specialized moisture-resistant underlayment designed specifically for laminate flooring. Ensure the barrier is properly overlapped and sealed to prevent moisture from penetrating. The proper installation of this barrier is critical. Proper installation of a moisture barrier is a vital step in preventing costly damage, and a small investment in materials will outcome in long-term savings and peace of mind. Remember, prevention is always better than cure.
Choosing the Right Underlayment: Enhancing Comfort and Durability
Understanding the function of Underlayment
Underlayment is more than just a layer between your subfloor and your laminate flooring; it plays a crucial function in several facets of the final installation. A good underlayment offers a cushioning effect, increasing the comfort and sound insulation of your new floor. It also creates a leveler surface, accommodating minor imperfections in the subfloor, and reduces stress on the laminate planks, helping to extend the life of your flooring. Various types are available, each with its own properties and benefits. Some offer superior moisture protection, while others offer enhanced sound dampening or thermal insulation.
Types of Underlayment: Making the Right Choice
The type of underlayment you select depends on a few factors including the condition of your subfloor, the type of laminate flooring you’ve selected, and your desired level of comfort and soundproofing. Foam underlayments are widely used because of their affordability and ease of installation. They offer good cushioning but are not the optimal when it comes to moisture resistance. Cork underlayment is another popular choice that offers excellent sound insulation and moisture resistance. It is often chosen for higher-end installations and offers a better, more luxurious feel underfoot. Other options include rubber and fiber-based underlayments, each with its unique set of pros and cons.
Installing the Underlayment: A Smooth and Level Base
Once you’ve selected your underlayment, proper installation is crucial. Roll it out, ensuring it’s completely flat and complimentary of wrinkles or creases. Overlap the seams slightly (usually about 2-4 inches) and use tape to secure the edges, creating a continuous barrier. If using multiple rolls, ensure the seams align perfectly to avoid any gaps or unevenness that could impact the final floor installation. An evenly installed underlayment is a foundation for a trouble-complimentary installation, which contributes to a long-lasting and attractive floor.
Acclimating Your Laminate Flooring: Preparing for Installation
The Importance of Acclimation
Before you even begin the installation process, it’s essential to acclimate your laminate flooring to the ambient temperature and humidity levels of your home. Laminate flooring is sensitive to changes in moisture and temperature. Sudden shifts can cause expansion or contraction, which could lead to problems like buckling, gaps, or unevenness. The acclimation period allows the flooring to adjust to its new environment, minimizing these risks. This process is crucial for almost all types of flooring, especially hardwood.
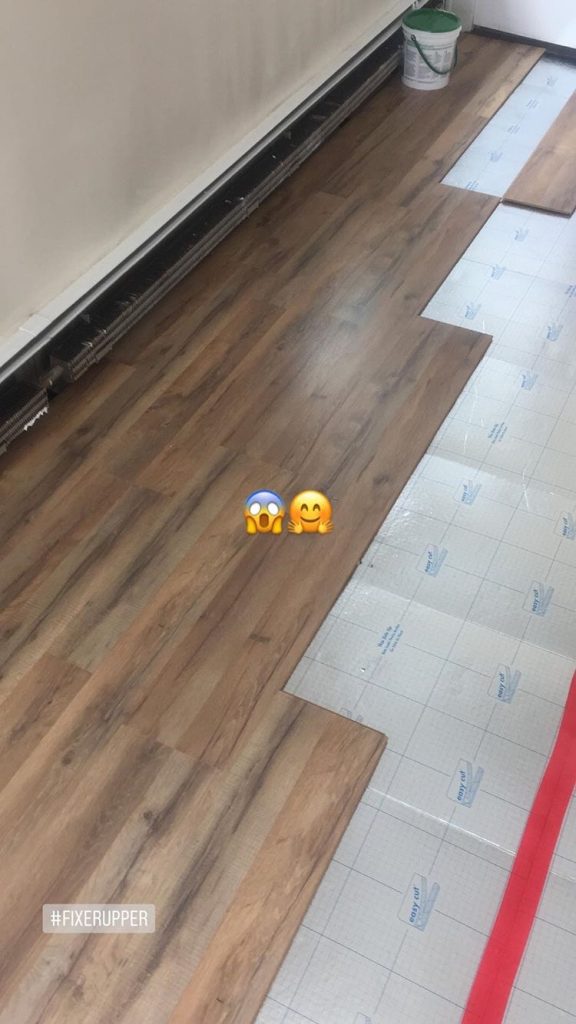
Installing Laminate Flooring: A Step-by-Step Guide
Starting the Installation Process
Begin installation in a corner of the room, usually the furthest from the entrance. This allows you to work your way towards the door, making it easier to manage the planks and ensure proper alignment. Remember to leave the recommended expansion gap around the perimeter of the room and near any fixed objects like walls, cabinets, or pipes. This gap is crucial to allow for expansion and contraction due to temperature and humidity changes.
Finishing Touches: Completing Your Laminate Floor Installation
Baseboards and Trim
Once the laminate flooring is installed, it’s time to install baseboards and trim to complete the look. select baseboards that complement the style of your room and your new flooring. Make sure to carefully measure and cut the baseboards for a perfect fit. Ensure they are securely attached to the wall using appropriate fasteners. Caulk any gaps between the baseboards and the wall or the floor for a seamless finish.
Installing laminate flooring effectively hinges on meticulous planning and execution. Remember to acclimate your flooring, ensure a smooth subfloor, and follow manufacturer instructions precisely. By diligently following these optimal practices for laminate floor installation, you can enjoy a beautiful, durable floor for years to come. Don’t hesitate to seek professional help if needed; a flawlessly installed laminate floor is an investment worth protecting. Now that you’ve learned these tips, are you ready to transform your home?